Thursday, March 2, 2023

Rose and Pear - Petal Bag


 I like the way that the rose turned out on this panel. The rose has both padded and dimensional petals, and the pear is padded silk shading over 3 layers of felt.

As I was working on the different panels the next stage was to add things like pearls, acorn caps and blueberries over the embroidered flat or padded elements on the fabric. 

Next to be stitched was all of the detached petals, leaves and other parts. They needed to have the pattern traced on another piece of fabric. The wire was basted down and then I colored the wire and fabric with a Copic pen.  This was done so that when I cut it out, any of the fabric threads that I couldn't quite get cut off would disappear and if the wire was not completely covered it did not show.  I used various techniques to fill in the shapes. A few were padded with string but mostly they were just stitched and shaded.  After all of the stitching was done, I put a very thin layer of acid free glue on the back so that they were more stable when they were cut out.
The ends of the wire were either just inserted into the fabric or wrapped with silk to make a stem before they were put into place. The ends on the back were bent down, couched to the lining fabric and then trimmed off. At this point the flowers, leaves and other elements were carefully bent to the required shape. 
Finally, I added flower centers, any other small details and then the gold pearl purl and spangles to the panel. Time to celebrate, the embroidery was finished. The photos at the start of each of the posts are of the finished panels.
Now all of that work was done, I could start to put it together.  I picked a soft gold silk taffeta for the lining and the inside bag. The stiffening is a combination of 7 and 10mm quilt template plastic. I wanted something that was thin but rigid and would not get crushed. For most of my small, shaped boxes or houses, I use comic board or Skirtex® to create the shape. I could not do that with this piece since the petals flex a little and if board gets bent it will stay that way and mis-shaped petals would spoil the whole bag.


Thursday, February 23, 2023

Poppy and Acorns - Petal Bag


 This is the Poppy panel of the petal purse. I thought that I would do a six petal poppy to go with the acorns. A number of embroidered poppies have only four petals, but others do have six. The acorn caps are detached buttonhole and the nuts are a couched gimp.

The fabric that I used for the background is a Dupon silk in off white.  I ran the warp from side to side so that the more distinct weft with the slubs runs up and down. I mounted the silk with a white cotton backing in stretcher bars to keep both layers of fabric taut while stitching.

To transfer the design to the fabric, I placed a tracing of the design on tissue paper on the silk and then thread basted through all of the layers with a pale gold silk thread. Later I carefully tore off the paper so that the design on the silk was there but not too bold. It was easy to cover or tear out as necessary.


When the design was on the silk, I could finally start the embroidery. I mainly used satin stitch or soft shading with added stems of outline stitch. During this step I also added the flat elements of the design like the couched gold tendril and the snail. The snail is silk covered bullion wire that it couched in a spiral.

It was fun to be able to start the color embroidery after all of the work getting to this point.


Friday, February 17, 2023

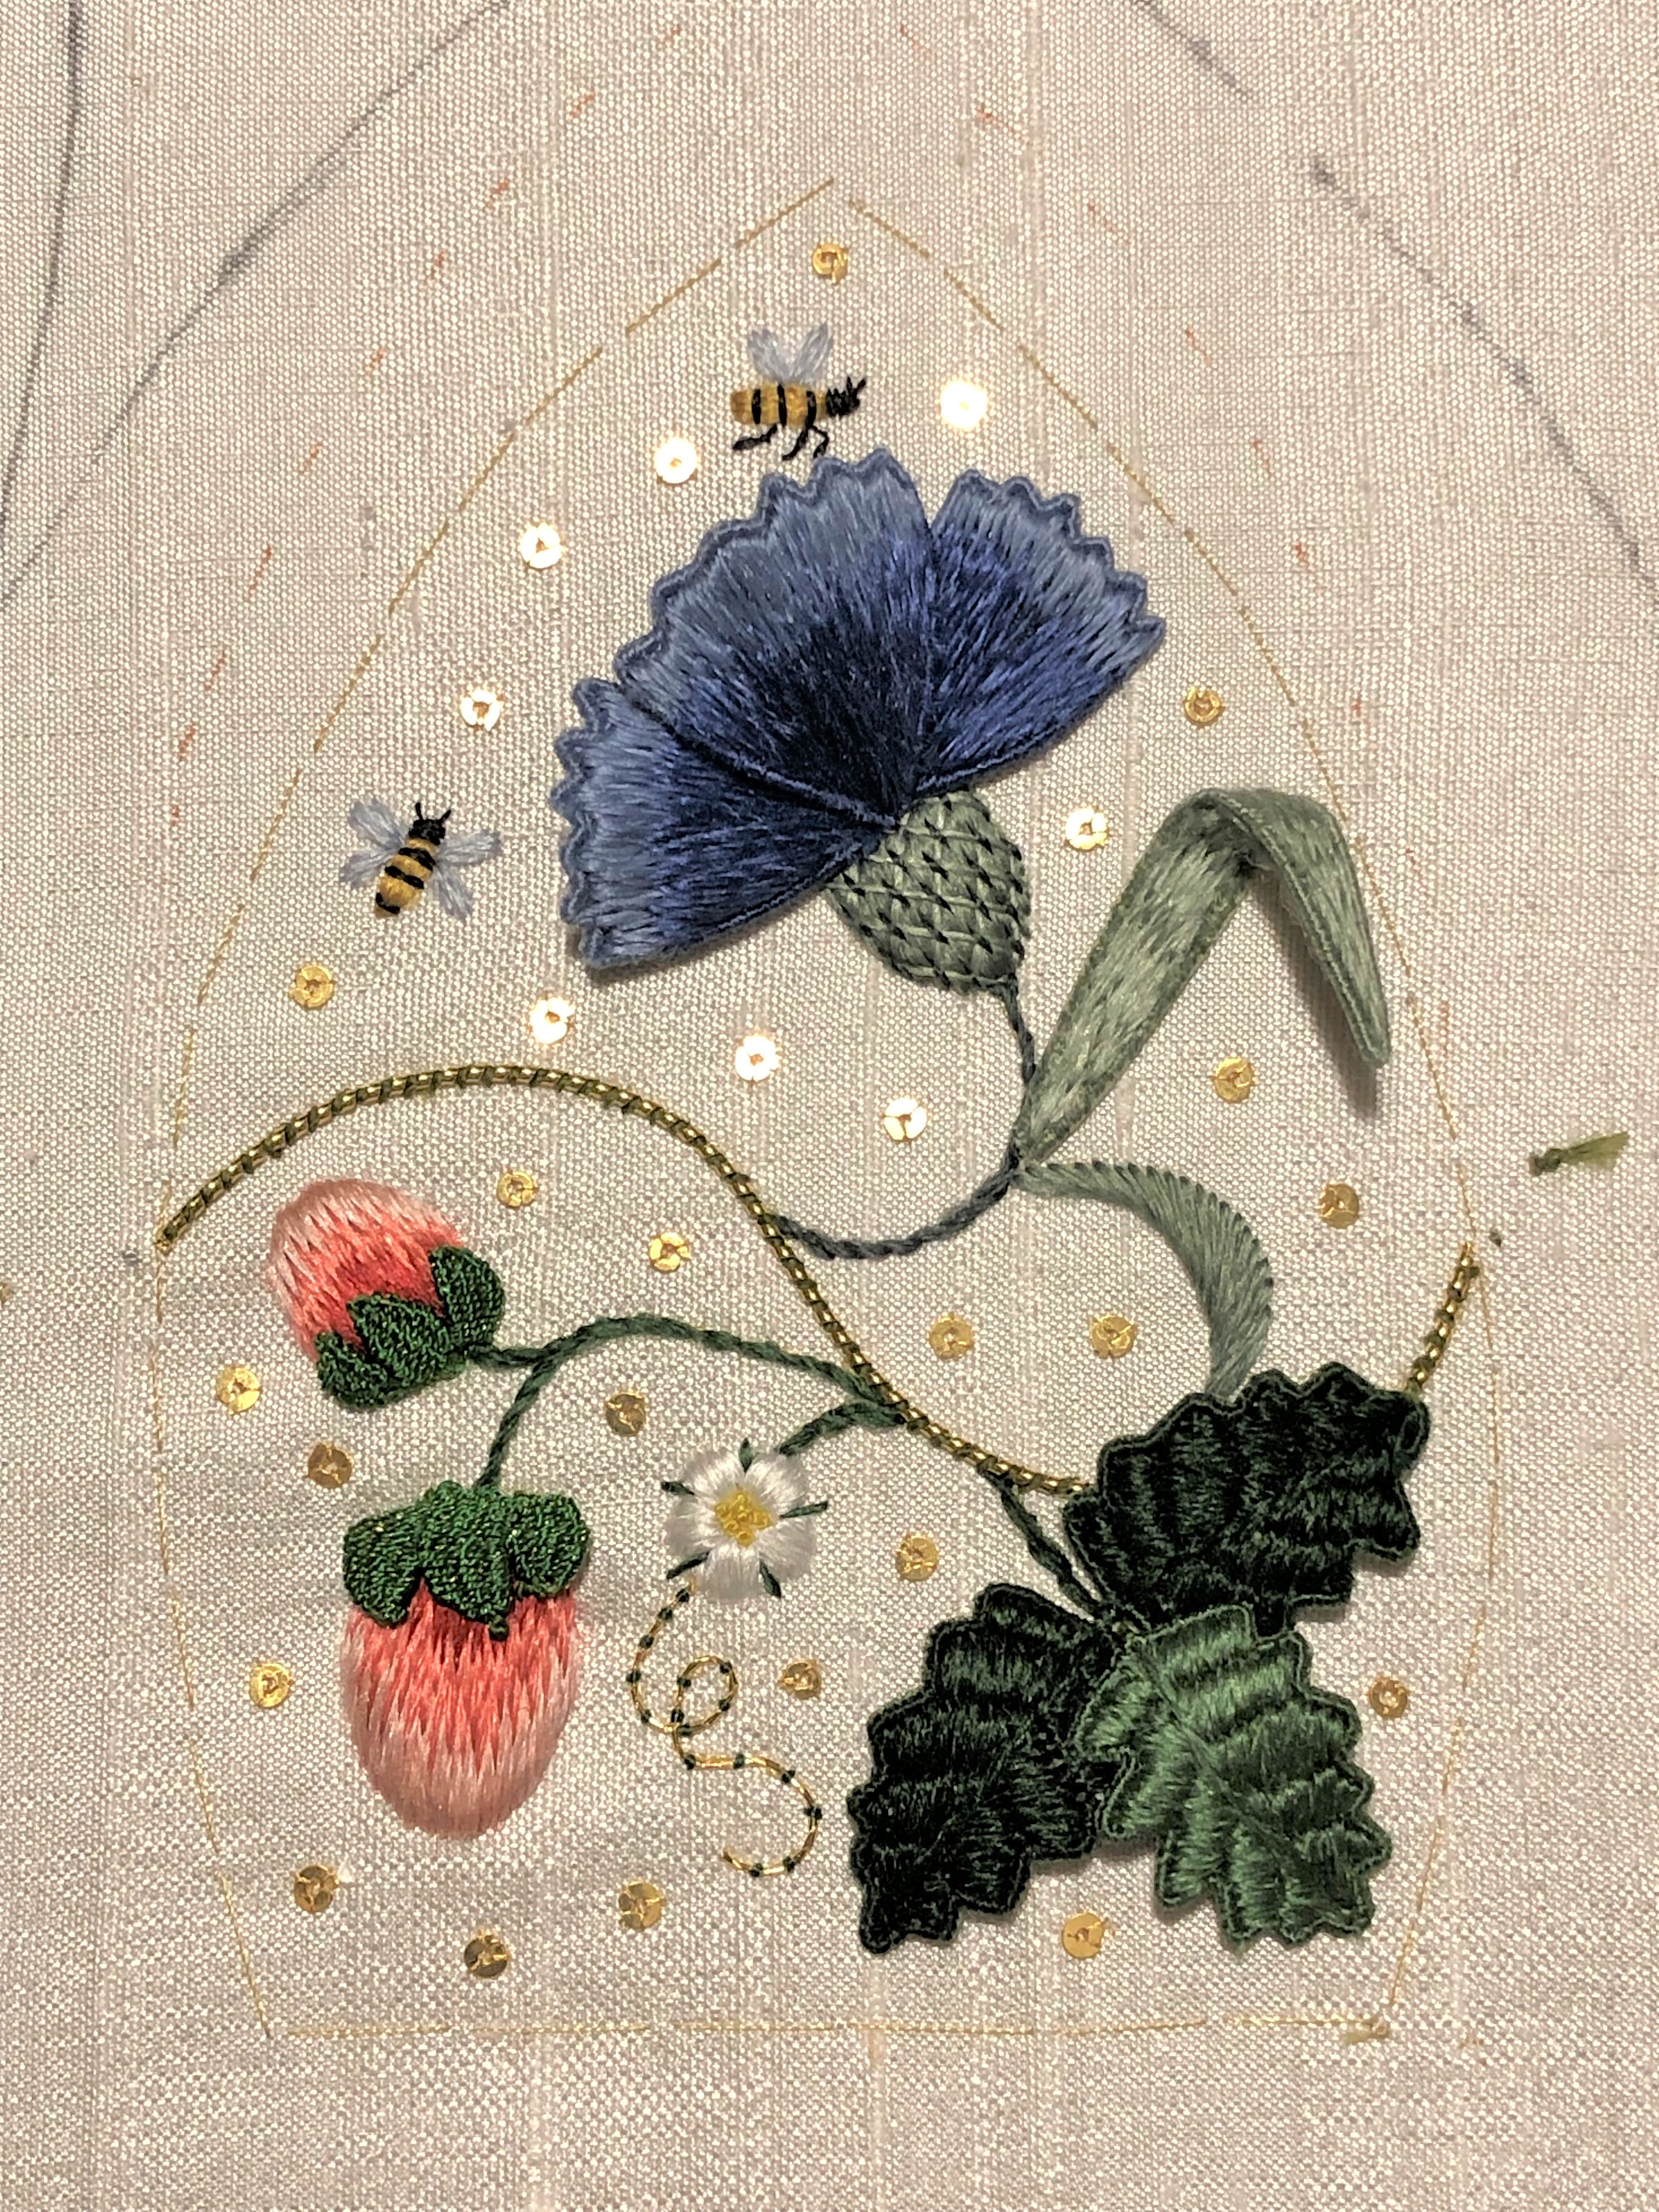
Corn Flowers and Strawberries - Petal Bag


The second panel of the Petal Bag features Corn Flowers and Strawberries.

As I continue on my stitching journey to finish the bag, here are a few more of the steps from thought to completed article.


Once I decided on the basic shape of the bag, I started on the drawings of the sides. It is pretty rough now but lets me know where I want to place the flowers, leaves and other bits. It is at this stage that I go back to my research to figure out final shapes of flowers and leaves. I try and get the number of petals correct and look at colors.


After the design is refined, I pick colors and decide what elements will be stitched on the base fabric and which ones will be cut out and added later. I try to make enough notes on the drawings so I can remember what I intended to do.


I have a wonderful selection of Chinese silk threads. They are a filament silk that is 2 ply and slightly twisted so they are easy to use as is or split when I need a finer thread. I mostly used them as they came with from the skein. There are 100 colors and each color has 5 shades. In some of  them, the color range is a bit more evenly graduated but it does give me lots of colors to choose from anyway.

Each skein is cut into meter long pieces, then braided and folded in a paper to keep it from getting tangled.


After the drawing are finished, I make copies so I can make a mock up of the bag. If the piece is three dimensional then making a roughly finished object will tell you if it is the size and shape that you want. It is much easier to change the drawings than to try to tweak  the stitched pieces.

I decided that the bag would be too big in the size that I had drawn so I made it smaller and then made another mock up and really like the new size. It was much better so I rescaled all of the drawings in the new size.


Thursday, February 9, 2023

Petal Bag - Daisy


I am going to post my stitching journey from idea, through design and finish for my petal bag. This is the Daisy panel of my bag. It is stitched and ready to finish.

I belong to a stitching group that has Zoom meetings twice a month. We discuss almost everything that has to do with stitching and sometimes have a project that we work on. 

We have just finished a long discussion on color and design but I am sure that we will revisit parts of that in the future. Even though we have a common idea for a project, none of us end up doing anything that resembles each others work. One of the projects that we started was the frog purse. I finished mine and have posted it on this blog under the 17th century label along the side.

A while ago, we started discussing stitching a Sweet Bag. These bags were very common in the Tudor period. They range from the very fancy bags that held the Great Seal of the King or Queen to plain ones that would hold sweet herbs in a clothes press. Of course, the ones that have survived are the fancy ones even though we have a number of records of many others that existed but are now lost.  Below are just three of some of the fabulous examples.


I had already done an 17th century bag and wanted to do something else so I started to do some research and decided to make a five sided petal shaped bag. There are many variations on the shape and decoration. In India they can be called Lotus flower or potli bags. I created a Pinterest folder of Sweet bags and other fancy bags so that I could get some inspiration. They are on my Pinterest page at carolynswebb.


I also did some research on flowers and motifs that were popular in the Tudor period and started to narrow down my choices of flowers. I did a thumbnail sketch of one of the sides and decided that was the direction that I was going to go in. 

Friday, October 14, 2022

Sampler set

 Many years ago I took a class from Merry Cox, it was at a Shepherd's Bush Retreat. The design was called Flowers From Thy Heart. I liked the idea but felt that it was not quite what I wanted.

Several months ago, I picked it up again for the UFO challenge for our EGA group. I decided that the design did not have enough sampler motifs for me, so I started adding to the design. I ended up using just a tiny bit of the original design. I liked the queen stitch  flowers so I kept those and the original colors and linen. I did add one more green but kept the limited palette of red, pink, green and tan.

Merry loves queen stitches and puts them in many of her pieces. One of her designs has hundreds of them in the flowers.

I also added smalls because what good is a sewing set with out a pincushion, scissors sheath, emery, ort box and needle/thread case. 


This is the sampler that I can turn into a tray by tying the ribbons at the corners to form a shallow tray to keep all of the supplies in.

The  needle/thread case was fun to create. I found a verse that I liked and charted it so that the verse is readable when the case is closed. I made folded needle papers that are labeled with the sizes and type of needle. I copied the lining fabric onto photo paper and cut small thread bobbins from it.

The scissors sheath holds both a hemostat and matching scissors.

Thursday, September 1, 2022

Japanese Embroidery

 A number of years ago, I started taking some classes in Japanese Embroidery. I finished several pieces over the years and intend to work on more. It is a very structured technique and takes a lot of practice to achieve the look that you want. We were told by our teacher that "sixteen hundred years of tradition cannot be wrong". There is a way to do everything and that is how it should be done. Practically perfect is the expected result.

My first teacher spoke little English and so we learned what is called "stealing knowledge"; we observed her stitching and tried to duplicate it. She of course helped us, but with hands-on demonstration rather than explanation.  We were told to stitch at least a half an hour everyday so that our hands and mind would perfect the muscle memory of how it should be done.

I, of course, am not perfect at it but the discipline of working to that standard has helped me with other embroidery techniques. I have taken classes from several teachers that trained at the Japanese Embroidery Center in Georgia.

I love the way that it looks and the feel of the silk thread as it slides through the fabric. Japanese culture uses objects like a certain flower or tree as a symbol to convey an  idea. Some flowers are thought of  symbols of winter or early spring. It is fun to "read" the deeper meaning of art if you understand what they mean. Western art has for the most part lost this concept, but if want to understand early Christian art you need to look for the special symbols that are included.

Japanese teaching is organized into steps. Step one is the beginning and each step introduces new techniques. If you finish the program you are on step ten. I have learned that there are different schools of Japanese Embroidery and each of them organizes things a little differently.

I got side-tracked with other projects but now seems a good time to get back to it again. This piece is the one that I am working on.

This is the first one that I did. It is a step one project.
This kimono is a step two.
The leaf of these grapes is a technique called fuzzy-effect. It helps to blend one color into the next one.


Tuesday, August 16, 2022

Hampton Court Palace

 I love the designs of Jenny Adin-Christie. She manages to take threads and wires that are familiar and design with them in such fun and unique ways.  She has a waiting list for her kits that I have a love/hate relationship with. I love it because I can order and she lets me know when they are available; I hate it because I have to wait until she can make up a group of kits. The kits are wonderful and so neatly packaged with labeled bags of the bits and parts. Years ago, before the rest of the world discovered her, I was able to just place an order and get it right away, but I am pleased that she has such great support among embroiderers.

There are always so many fun techniques and surprises in her designs that I try very hard not to alter what she had done. I did make a tiny change to this design. I made the sun face a full circle on my embroidery. She has hers in a box with a rim that cuts off the top of the sun and I didn't want to do that so I just finished it. This is a kit that I have been wanting to do for years.

I do have a book and a kit on order so more wonderful things are coming in the future.